Sometimes, we experiment with hair colour and end up with a shade that doesn't quite meet our expectations. Whether it's a DIY mishap or a professional colour that didn't turn out as planned, the good news is that there are safe and effective methods to remove unwanted hair colour. To find out how, we quizzed Josh and our Master Colourist Jason about the dos and don'ts of colour removal, and how to prevent an undesired result in the future.
1. Don’t try to remove hair colour build up at home
You might have heard myths of washing up liquid remedying a stranger’s car-crash colour, but believe us, it isn’t that simple. If you’re desperate for an answer as to how to remove hair colour at home, “A clarifying shampoo can soften colour build up over time and reduce dulling and tonal changes,” Our Creative Master Colourist Jason suggests. But this supposed quick fix shouldn’t be banked too often. “Avoid using too regularly however, as they can strip the natural oils from the scalp causing irritation and flakiness.”
2. Consult your hairdresser about removing hair dye build up
When it comes to reversing a colour build up always get professional advice, says Jason. So what happens in the salon that we’d struggle to achieve at home? “It depends on the end goal,” says Jason. “If it is a slight over saturation around the face frame, which is common on the finer hair there, a few strategically placed highlights can be sufficient to brighten it up. If it's an all over build up and a dramatic change is desired, it could take a few hours or even a few appointments,” he explains.
3. Take your time with touching up your greys at home
Say our build up has been professionally corrected, prevention techniques have been noted, and we’ve waited out a good inch or two of regrowth. What now? "Speak to your colourist for the best way to maintain your colour at home, they know your hair and can show you the areas to retouch so you aren't overlapping colour unnecessarily,” Jason advises. And if you are ready to colour again, Jason says the trick is in the application. “Be neat, be prepared, and have all your tools ready,” he tells us.
For a professional finish, you’ll need a mixing bowl, application brush and some section clips. Permanent hair colour is designed to stain, so a dark-coloured towel and protective gown are also a good idea. The next step is to identify exactly where you need to colour. “Look at the roots of your hair across the temples, underneath your hair. This is where you will see the pattern of greying," says Josh. This is important because it will show you the areas you need to apply the permanent colour to first, and leave for the longest. You don’t need to apply permanent colour to your ends – they already have plenty of colour.” Josh recommends only combing colour through to your ends if you have a one colour rather than highlights or balayage, for the last 5-10 minutes of the 30 minute process time. This prevents ends looking too dark and heavy.
What is hair colour correction?
Ever wondered how do hairdressers strip hair colour? Read on as Jason takes us through a real-life example of colour build up, and how he reversed it in the salon.
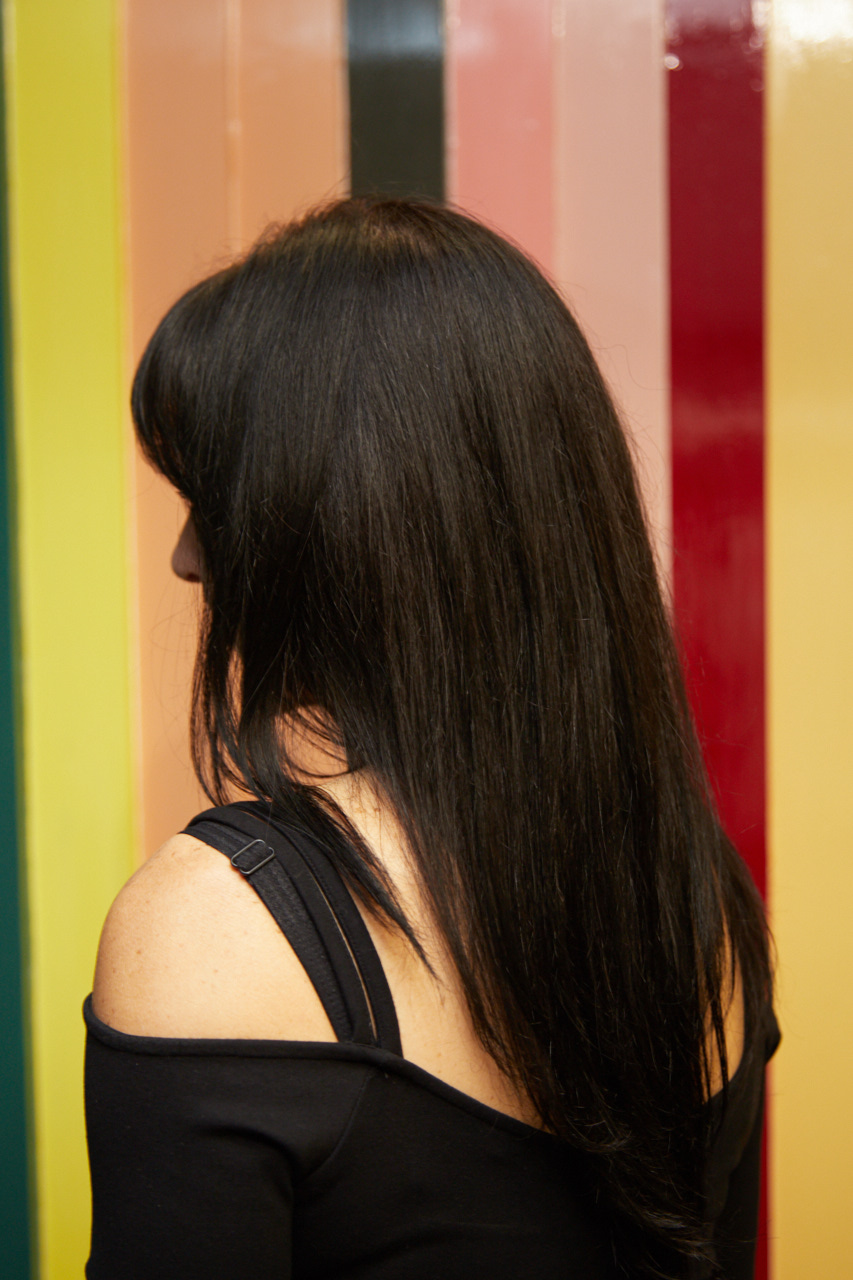
Professional colour correction before and after
“Lisa had been using very dark permanent colours over the years, as she felt she had to use colour darker than her own hair to achieve grey coverage. A constant use of dark colours has led to a dye build-up, which makes her naturally reddish brunette hair appear black, and dull. The aim is to get her back to her natural, softer, warm auburn, so that she can start using Josh Wood Colour Permanent Colour Kit to cover her roots when they grow back in."


"As Josh Wood Colour offers 100% grey coverage in all of their shades, she will be able to return to her natural colour and keep up with grey maintenance at home, while keeping a multi tonal, dimensional hair colour that matches her natural shade. As from now on she will be matching her natural shade, she won’t get that ‘built up’, heavy look. Using a shade shot plus will also help maintain the natural tones of the hair, even on her roots. I recommend a Chestnut Brunette Shade Shot for Lisa”.
“So firstly, I lightened up the mid lengths and ends using a lightening product, Redken Flashlift. We waited, and once this had reached the appropriate level of brightness, I rinsed and shampooed her hair. I then applied a treatment to the hair, as using a lightener to remove colour can temporarily dry it out. We used an extra conditioning mask – Josh Wood Colour Miracle Mask.


“We then dried her hair, and reapplied a new, lighter root colour, using Redken Colour Gels Laquers (5n), and then a lighter colour to the end ends, using demi permanent colour, such as Redken Shades eq (6nb and 6g). Using a darker colour at the roots and a lighter colour at the ends gives a really natural looking result, as if the sun has lightened it naturally”.
“After, we rinsed and shampooed again - and after a trim to get rid of the built-up, old ends - Lisa was good to go. She doesn’t have time to visit a salon frequently for root touch ups, so she will now be able to use Josh Wood Colour Permanent Kit in between any salon trips she makes. Applying apply on the roots to cover greys, without taking it through the ends. Between colours, she can also use a root touch up for semi-permanent grey coverage”.

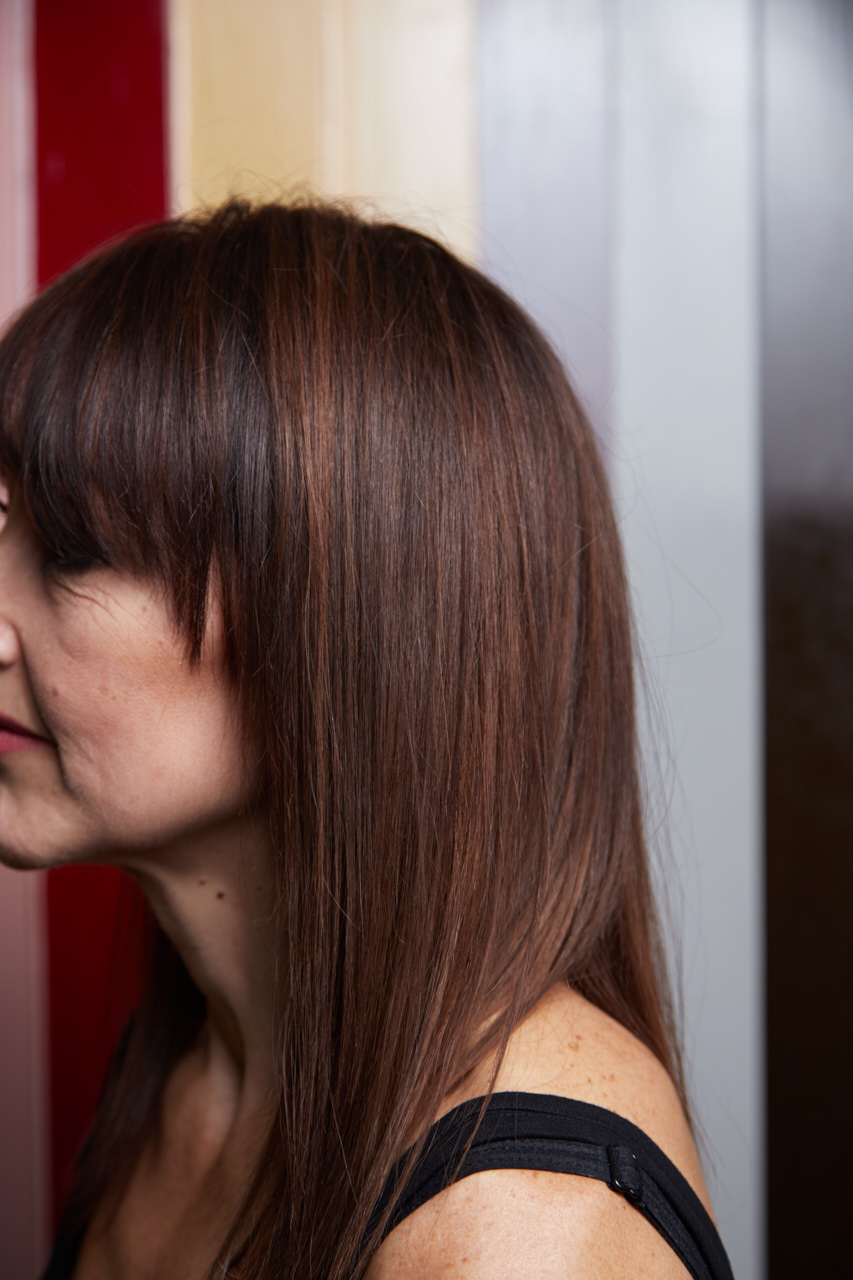
“I would recommend from now on she uses a sulphate-free shampoo and conditioner (for her, I’d recommend the Josh Wood Colour care range for fine brunette hair) to stop the colour from fading, and to keep the hair clean and healthy. She should also use a mask weekly to maintain her ends, which may feel slightly drier due to the lightener. I've suggested Miracle Mask as it’s super hydrating but also lightweight enough for frequent use”.


